Sustainable Sunday – Mend & Make Do

Fast fashion is killing the planet – learn how to “mend and make do” to get the most out of your clothes.

When I was a kid, my mom bought everything about 10 sizes too big – “you’ll grow into it!” she’d insist over my groans, and I would head off to school with about a foot of denim rolled at my ankles.

I really am only exaggerating a little.

It may have been an annoyance then, but as I’ve gotten older I’ve found the value in making things last as long as they possibly can, and have realized that that habit was passed down not just by my mother, but from hers who grew up during the depression, and my grandmother’s mother who grew up at the turn of the (last) century, and likely for years before that.

Mothers have been following the “mend and make do” adage for generations.

You’ve likely rolled your eyes after hearing someone older say, “they just don’t make things like they used to!”, and admittedly, there are many things we have today that are better than what we had a generation ago: clothing is not one of those things.

Fast fashion is killing the environment. And no, that’s not as outrageous as it sounds when you break it down:

  • North Americans send over 10 million tonnes of clothing to the landfill every year, 95% of which could be reused or recycled
  • One trillion kilowatt hours are used by the global textiles industry every year, which amounts to roughly 10% of the world’s global carbon impact
  • It takes 2,650L of water to produce one cotton t-shirt, which is basically the equivalent of 28 baths
  • It is estimated 17-20% of total industrial water pollution comes from textile dyeing and treatment

Personally, I’ve always been someone who washed my stuff in cold and hung it to dry. I take care of my clothes and that’s why, at 30(+) I still have things I wore at 14 that are in great shape. Unfortunately, the same cannot be said for some of what I’ve bought the past few years, much of which has barely lasted a season. And it’s not about the quality, or, at least not the price. As I’ve gotten older I’ve tried to buy better quality items in hopes that they will last, but really I have found that rarely do price and quality have any clear connection. A lot of the time, a shirt I’ve spent $60 on falls apart faster than one I’ve bought for $10.

So, what do we do?

For my part, being a vintage fan, I think there are 2 great ways to go – buying vintage clothing and mending what you already have.

This week we’ll focus on mending.

Don’t worry, I’m not much of a sewer myself, so I’m going to do a brief run-down of how to determine what can be mended and how, and then maybe at a later date I’ll get someone more skilled to show how you can really step it up a notch.

The first thing you need to do is identify what needs to be done.

What Needs Fixin’

Sounds obvious, but I don’t just mean find where the tear is. Think about what you really need to have repaired, and why. Got a hole in your jeans? Does it matter? Some people pay extra for that. Got a hole in a blouse? Do you wear it under a sweater or jacket? Maybe a quick fix to stop it from getting worse is enough. Is it something that will definitely be seen? A better quality repair is needed. Sure that it’s beyond repair? Think about whether someone else would feel the same (can you donate it to a thrift store, or a theatre company?), whether you can reuse it in another way (cut up could it make a cute headband? a pillow?) or how you can recycle it (like through our Value Village FunDrive).

On The Mend

Once you’ve determined the spot that needs fixing, you need to figure out what kind of fix it needs. Are you going to be adding material to create a patch? Stitching to repair a hem or a seam? Doing an invisible mend by darning? To determine what path to choose you need to know, a. the end result you want, and, b. the material you are working with. So let’s break some of that down.

mending silk

How to Mend Silk Lingerie in 2 Steps (Without Using a Needle and Thread!)
Use fusible material to repair delicate silk

Silk is a delicate, natural fibre harvested from the cocoons of silk worms. It’s breathable, beautiful, and notoriously difficult to repair. But if you find yourself with some damaged silk, don’t despair. While the chance of a totally invisible repair is slim, fusible fabric placed on the inside of the garment can save many pieces, like the vintage lingerie in this article. Fusible interfacing is not a difficult thing to use but can still be an easy thing to mess up: make sure you read the instructions twice, watch the temperature of your iron, and take your time so you don’t make the damage even worse. If you have a steady hand and some sewing experience, you can try to take a hidden piece of fabric from your garment and patch it with the same, but don’t try this if you’re not a sewer, it’s finicky work. Along with rips or tears, snags are a common problem with silk: this post gives a detailed breakdown of how to fix them, and why you should do that before it turns into something bigger, like a hole.

MENDING denim

Jeans Tips: Easy Ways to Patch Your Jeans - WeAllSew
Creative denim fix with embroidery

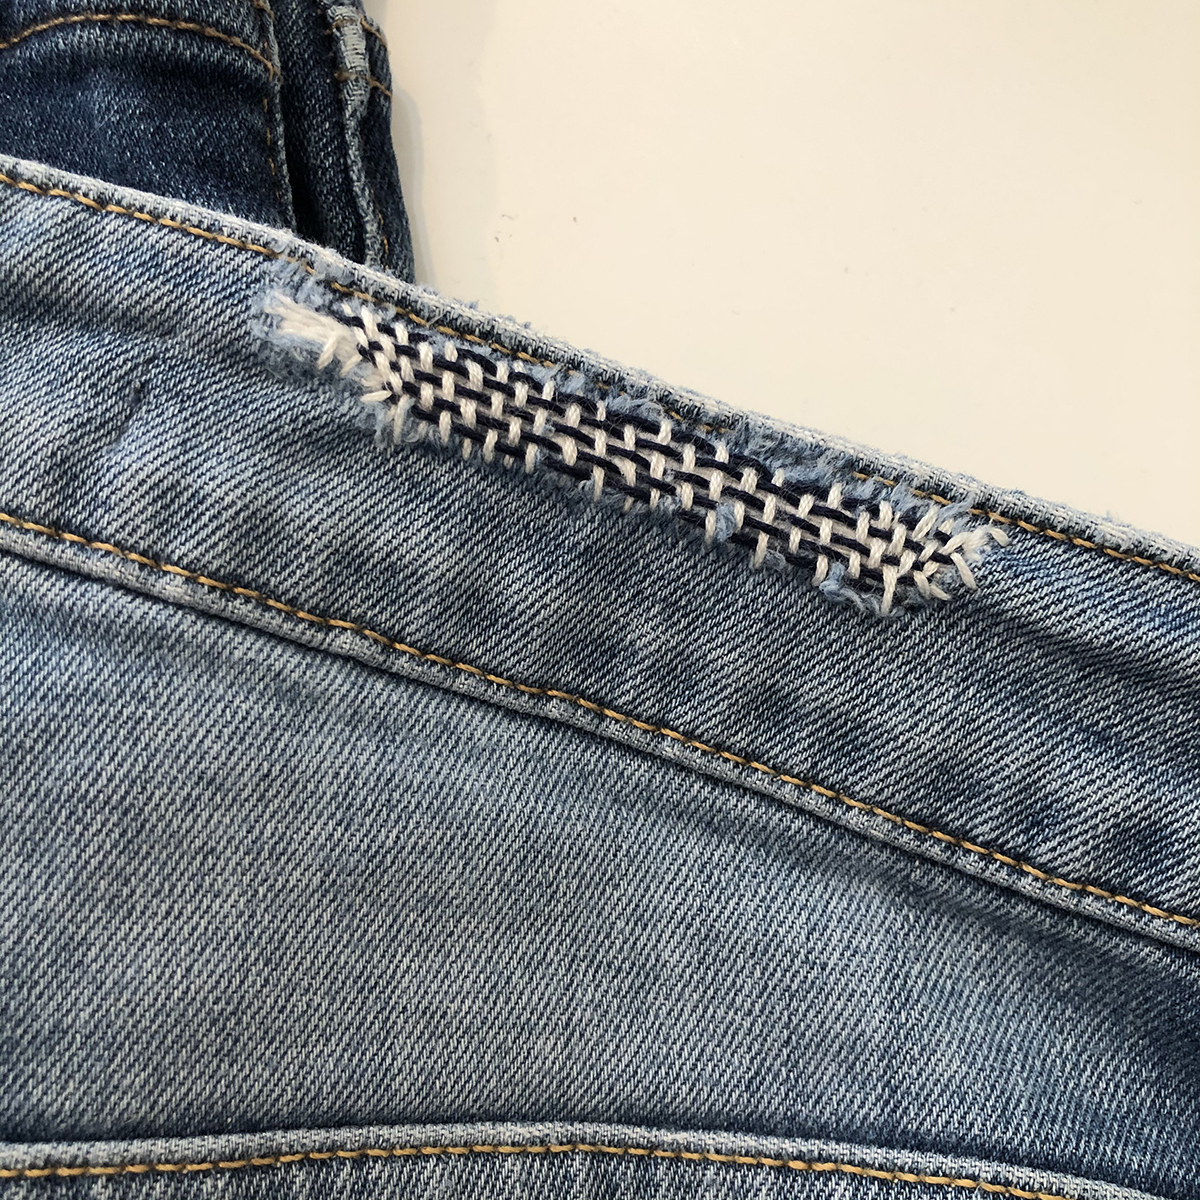
Pure denim is a very sturdy material, created in the mid-19th century for use as workwear. But most of the denim we get today is a blend, often containing lycra or some other flexible material to make them stretchy and form-fitting and that has the unfortunate side effect of being more prone to damage. This article shares several ways you can repair your denim, whether you want to try to stitch an invisible seam or play up the patch with some sashiko embroidery.

mending knits

Mending A Knitted Sweater - PermAdventure
Darning can save a damaged knit

You’ve likely heard someone talk about “darning socks” but if you’re under 40, there’s a good chance you don’t have a clear vision of what that really is. Out of all the clothing I buy socks are easily what I have to replace the most, and it’s frustrating because it feels like I need to buy them every year. I’m a bit of a hoarder when it comes to my favourite clothes, and as nearly all my socks have some kind of strange pattern or design on them, I really do hold on to them until there’s nothing left (some are basically anklets by the time I throw them out). But back when our socks were a little bulkier and knit it was not uncommon to patch up those holes to make them last another season. This site explains how to darn, fix a tear with felted wool and mend with thread – great advice for anything from socks to sweaters.

mending cashmere

REPAIR - Invisible Mending of Cashmere | Our Blog
Invisible repair on cashmere.

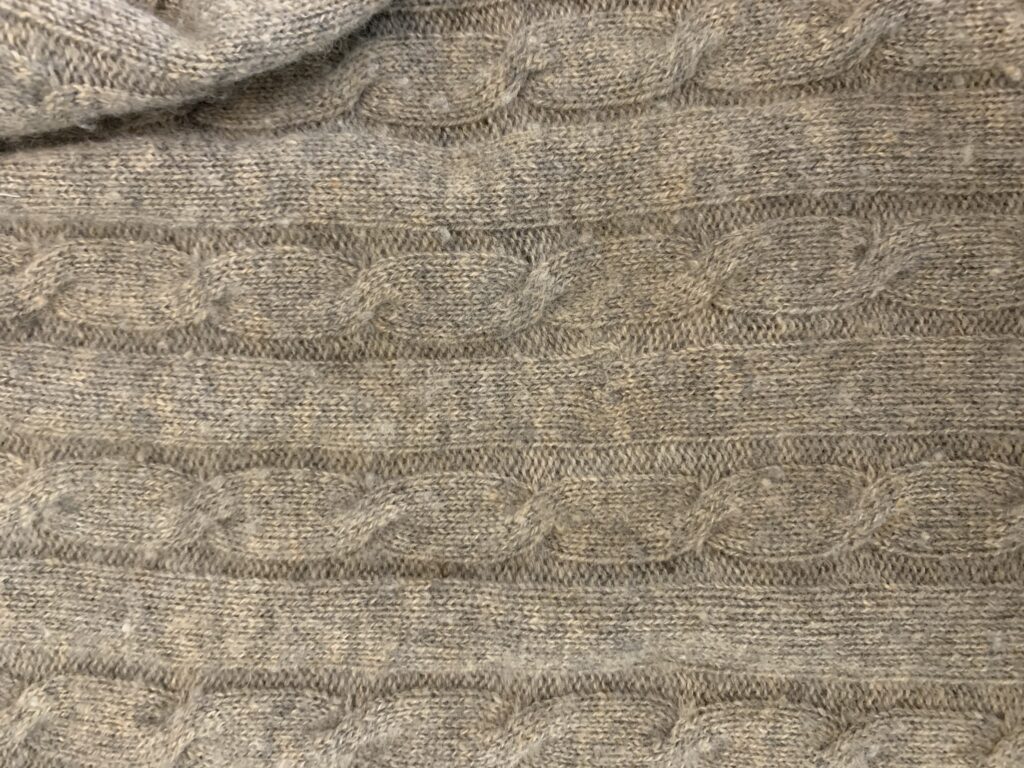
Like silk, cashmere is delicate and expensive, and until recently I would have thought there wasn’t a good way to fix it – then I came across this YouTube tutorial on how to repair cashmere with fusing powder and chopped up fibres from elsewhere on the garment. Pretty cool stuff.

***

There are countless other fabrics out there but I think this range will give you a good idea of the basic mending techniques available, and what types of materials they work best on. Basically you can patch it – with either an invisible, or a visible, decorative patch – or stitch it – with an invisible stitch or embroidery. I have a pile of mending I’ve been meaning to get to for ages, so when I finally pull it out I’ll be sure to record my progress, regardless of how it goes.

Have any of your own tips for mending garments?
Let us know in the comments.

How to Dress the 1920’s – Affordable Modern Day Alternatives to Authentic 20’s Women’s Fashion

We’ve all had that disappointing moment, when, in dressing a period show, we realize how difficult and more so, how expensive authentic period fashion can be.
While one of Bygone’s mandates is to keep our costumes as authentic as possible, in some of my other productions I’ve had to bend the rules and work with modern clothing that mimics the shape and style of period pieces.

In this blog mini-series, I will demonstrate some simple methods for achieving period-esq looks on a budget. If you’ve got some tips of your own, feel free to share them in the comments!

The 1920s Silhouette
Chances are, when most people think of the 1920s, the first image to come to mind is that of the “flapper”. A drop-waist, lots of fringe, knee-length skirt and swinging beads. While this look works for “party girl” characters, or those in a musical, it is not the style that was worn by the majority of women. Still, it is a great stepping stone for a basic women’s silhouette. Let’s examine some basic silhouettes here:

Fig. 1 – Here is a 1920 silhouette from the Fashion-Era website. Early in the decade styles were still fairly conservative. Hemlines reached below mid-calf, exposing no more than the ankles, and empire-waists were still common. Sheath-style, tube-like dresses that gave the women a androgynous look were popular and floppy hats, low on the brow, were often worn (see my blog on hats for more details).

Fig. 2 – Another silhouette courtesy of Fashion-Era , this time from 1922. Note the drop-waist. Flowing, light-weight fabric in the skirt.

Fig. 3 – By the middle of the decade, hemlines were shorter now reaching mid-calf (but still always covering the knee). The drop waist was still fashionable, and the skirts were still often made of flowing fabric.

Fig. 4 – Not an authentic silhouette, but one immediately recognizable as being from the decade. Now the hair is cut short, rather than pinned up, in a style associated with Louise Brooks. Still a drop-waist. Here the skirt seems to be made of fringe or even feathers. The hemline is higher than what would have likely been seen (the knees were rarely revealed).

1920s Colours

The Roaring Twenties saw a wide range of colour in fashion. While only a few decades earlier, most women were wearing dark, dreary colours, the 20’s featured clothing from pastels to bold primary colours. Gowns were generally monochromatic, layering colour-on-colour details and relying on beading or embroidery for variation, rather than mixing colours. This helped to create the long, lean look that was the signature style of the decade.

Fig. 5 – Bold, dark colours for the winter months. Note how the dress itself is nearly entirely one colour – at the very least, monochromatic. A contrasting hat was sometimes worn, and most shoes were black leather.

Fig. 6 – Salmon colours, emerald, and lots of blue. Again, mostly monochromatic although note the high-contrast in the yellow and black gown, and the mixing of natural fur with a bright pastel.

Fig. 7 – More pastel colours for the summer months, and again, blue! Shoes for summer frocks were often of lighter, brighter colours that matched the dress. While there is a lot of detail on the gowns, they continue to be primarily monochromatic.

Fig. 8 – Mixing various shades of the same colour for some visual interest, but still keeping the look monochromatic.

Fig. 9 – Bold, Art Deco inspired styles. Black and white high-contrast gowns with accents in red or pink give a startling, stylized look.

Again, nearly any colour could be used for the 1920s, just remember to avoid any complimentary colours within one outfit for a more authentic look. For additional info, The Vintage Traveler blog has a great post on dating vintage fashion with colour.

1920s Fabrics

A variety of fabrics were available in the 1920s. The majority of things that we purchase today were available then, with the main exception being “stretchy” fabrics (no Lycra in the 20s!). While daily wear was likely simple cotton dresses, I will briefly go over some fabrics that those who do not sew may not be as familiar with:

Chiffon: Made from cotton, silk or synthetic fibers, this sheer, light-weight fabric is woven in a way that puckers the fabric slightly, giving it some stretch and a rough feel. Available in a wide variety of colours it is most common in evening wear and can give an elegant, floating appearance.

Satin: A light-weight, flowing fabric with a glossy front and dull back, satin is another popular formal wear choice. Often associated with nightgowns, this fabric hangs loose and looks stunning when draped. Also available in many colours.

Taffeta: Generally more expensive than the previous two listed, it is a crisp, smooth fabric with a bit of a sheen. Stiff and able to hold some shape, taffeta can be used to create things from corsets, to gowns that maintain a consistent shape. Many colours, but generally less variety (at least in local fabric stores) than the other two, likely due to the cost.

Velvet: A thick, woven, tufted fabric, generally made in deep, dark colours. Smooth and soft, the fabric is associated with nobility and high status, and so the high price tag shouldn’t be a surprise.

I won’t go into too much detail for these, as it is not my area of expertise. However, for a great resource on what fabrics to use, and how to combine them, check out this site.

How-To: 1920s Style in Modern Day Fashion

So what to do with this information now? Certainly those with the budget can source out authentic patterns (Vintage Vogue has a few) and buy expensive fabrics, but when working in community theatre this is rarely an option. To give you an idea of some affordable, modern day pieces that can be used to imitate 1920s fashion, check out my design boards below:

1920s Style from 2014 H&M Dresses

A great resource for affordable dresses is H&M. While the styles you will find here will generally be too short or two revealing to be a really authentic 20s look, there are some dresses that can be a good starting place. Whether you buy a gown that already has a waist, or go for a more loose-fit, flowing style, give the dress a 20s flair by adding an exaggerated drop-waist. A simple way to do this (especially for non-sewers) is to add a sash (remembering to keep it monochromatic!) out of something like satin, tied low on the hips. For those with more sewing knowledge, sleeves could be fashioned out of chiffon or additional beading could be added. Throw on some retro pumps, a few strands of long beaded necklaces, and crop the hair (whether by pinning it up, or cutting it) and you will quickly and cheaply achieve a 20s look.

Sourcing 1980s & 90s Fashion for a 1920s Look

The community theatre costumer’s best friend is of course, the thrift shop. When trying to create a 1920s look, I generally go for 1980s and 90s fashions. As you can see in the board above, many of the styles of those decades incorporated the drop-waist, as well as large collars, lengthy sleeves, and an overall loose look. You can find these types of dresses in your local value village, or, if you happen to have some old patterns lying around, can make them and tailor them as required.

Finally, online resources like ebay and etsy often have real vintage, or vintage styled clothing. They are worth a look, at least for inspiration, if not to actually purchase the garments. Costume and party stores will often have flapper costumes, but these are generally very stylized and won’t do if you’re trying for a serious period piece. However, the cost is sometimes low, so I keep these in mind for things like dance numbers that require a lot of performers. When trying to do a cheap flapper look, simply create a headband with a feather accent, wear it low on the brow, include a sleeveless, straight-fitting tank top and a low-riding skirt, preferably out of fringe or something that moves. Throw on some cheap plastic beads and voila! Not a look I often need for my shows, but it does in a pinch.

So there you have it! A brief how-to on 1920s women’s fashion for theatre. There are tons of great resources out there, and to be honest, I usually start with a simple google search for my inspiration. Do you have any great 1920s resources? Share them here in the comments, or on our facebook page!

All for now,

E.