Check out these vintage recipes for holiday leftovers in this week’s Sustainable Sunday post.
‘Twas the day after Christmas, and all through the house – were leftovers.
If you’re like me you’re probably happy to eat the exact same meal 5 days straight until every crumb is gone, but if you’re looking to mix things up a bit, try some of these wartime recipes to make sure no leftovers go to waste.
The 1940s Experiment has 100 Wartime Recipes – check it out!
Think you’ve hit the end? Remember, bones can be boiled to make broth or stock, and some vegetables (like celery) can be propagated from a stump. Egg shells can be ground up and put in your garden as fertilizer (especially good for roses), and things you’re sure are trash should be composted if they’re natural, and containers that are recyclable should be rinsed out before being tossed in the bin.
Unfortunately, most wrapping paper is not recyclable, but double check, and if it isn’t, see if there’s some salvageable to wrap smaller gifts with, or to do some crafting. Mend and make do!
Get some tips and tricks for finding the perfect vintage lingerie for this week’s #sustainablesunday!
If you’re a fan of true vintage clothing, chances are at some point or another you’ve tried something on, and even if it fits, thought “something isn’t right…“
Chances are, the thing you’re lacking is the right underclothes.
Vintage women’s clothing was made with the assumption that you were wearing specific garments underneath – chances are this included a corset or girdle. While the styles changed with the decades, the desire to shape the female form into something it was not stayed fairly consistent through the 20th century (and before). You can read about the changing styles in our previous post, here.
A late 1930s girdle advertisement.
The same can be said, though to a far lesser extent, about men’s clothing. If you’ve ever tried to put on a pair of vintage trousers over some baggy boxers, you’ll know what I mean. Similarly, a lot of shirts look strange without an undershirt underneath as their fabric is too transparent, and even then it is clear they assumed you’d wear a jacket or blazer, otherwise the outline of the undershirt is clearly seen.
1930s pattern – check out those sock garters!
When we did The Rear Window back in 2019, we visited Gigi’s House of Frills to learn all about vintage underthings, and I can tell you the difference to silhouette is incredible. While the dresses already looked lovely on our actors, the addition of a bullet bra and girdle stepped it up to Hollywood glam levels.
There are many places in the city and online where you can find authentic vintage lingerie, but I highly recommend your first stop be Gigi’s. She is not only lovely and knowledgeable, she carries the widest range of sizes I have ever seen for underwear and lingerie. If she doesn’t have true vintage in your size she will have a modern alternative that is sure to work.
Photo courtesy of Uye SuranaPhotos of Rose by GigiPhoto of Jill by Gigi
When it comes to buying vintage lingerie, there’s a few quick tips I would share to make the process go smoothly;
Sizes Change: sizing hasn’t always been standardized, and when looking at vintage patterns or clothes sometimes the number can be a bit of a shock to your system because you’re judging it by the sizes we use today. If you can’t try something on, make sure to at least read the measurements and not assume that the number listed will give you an accurate idea of fit. For example, this helpful article explains how someone who was a size 14 in 1937 would be a size 8 in 1967 and a 0 today.
Most People Were Shorter: we tend to think that everyone was smaller “back in the day”, but that’s not really true. Just as slim men and women today get more representation in the media and in stores, the same could be said for the 1920s, 40s, 50s etc. So while data suggests that there are more overweight people now than there were then, that isn’t to say that everyone was super tiny like the actors we picture from golden age Hollywood. Rather, the materials we have left today are more likely to be what was most produced then, and so it’s easier to find pictures of slim people, and clothing in smaller sizes. It’s really a numbers game. What has increased across the board (in Canada at least) is people’s average height. This means when you are shopping for vintage stockings or girdles, if you’re on the taller side (as I am), it can be hard to find something with the right fit. I often find my torso is a bit too long for pieces I would otherwise be able to fit. I don’t have any great advice for this other than to just remind yourself that there’s nothing wrong with you if you’re having trouble finding something that works, it was just made for someone at a very different time.
Fabrics Were Different: those of you old enough to remember the days before lycra in jeans will have an easier time with the unmovable, unforgiving fabrics from days of yore, but today most clothing is made with so much stretch we don’t have to give much thought to the fit provided it is in our size. Compared to Spanx, vintage girdles can feel like a bit of a torture device, but when you get used to getting them on and off many people find the fit not at all uncomfortable, and I think they do a FAR better job at shaping, if that’s what you’re going for. If you’re new to vintage shape wear go for something that is adjustable, whether with lacing or multiple hooks, as even something that “fits” can be a bit extreme for someone new to the game. And if you see something that says it was “cut on the bias”, that’s a good thing. That’s the old-timey way of making something have a bit of give, and is the closest you’ll find to stretchy material in a lot of vintage wear.
So there you have it! A quick rundown on vintage underclothes. They’re fun, they’re glamourous, and they’re sustainable because as we always say, the most sustainable item is the one that already exists. So shop vintage.
Here’s some tips on how to be a little greener this holiday season, without losing some of the magic of those pretty boxes and bags under the tree.
Many of my fond memories of holidays past involve me eagerly tearing away wrapping paper to find a surprise underneath – sometimes unwrapping was half as good as the gift itself. But as I get older, I feel an increasing level of guilt every time my eye is caught by the pretty papers at the store – isn’t this just adding to waste? How can I justify buying something that will have so little use?
This year I’ve decided on a bit of a half measure, which is to wrap (with paper I already have) the gifts for the young children in my life, and to use only reusable things for adults or any I’m not positive will appreciate it. When you’re trying to go green it’s ok to do it in stages – every little bit helps.
So here’s some tips on how to be a little greener this holiday season, without losing some of the magic of those pretty boxes and bags under the tree.
Knot Wrap
It’s Christmas Deer wrap from LUSH – sweet little retro vibe!
Knot Wrap has grown in popularity here the past couple years, but it’s not a new concept. LUSH states it nicely on their website;
“Based on the Japanese tradition of Furoshiki, Knot-Wraps are a great way to wrap any gift. Made from either organic cotton or two recycled plastic bottles, each one of our beautiful Knot-Wraps is extremely kind to the environment. And the best part? They’re meant to be used again and again as a scarf, accessory or tote, so it’s a bit like giving two gifts in one. How thoughtful of you!”
Not only pretty and eco-friendly, you can let friends know their gift is wrapped in artisanal ribbon, because we all know the true meaning of Christmas is giving the best gift.
Probably 90% of my gifts as a kid can wrapped in that thin plastic curling ribbon that has been virtually unchanged since my parents were kids – until now! Admittedly, it’s a bit on the pricey side, but this seems to be a very pretty eco-alternative to that oh-so-synthetic stuff we all know.
Our artisanal ribbon maker in Milwaukee, Wisconsin is committed to the highest levels of sustainability. They use water-based dyes, soy-based non-toxic inks, and cotton yarn that is 100% grown and dyed in the USA.
Hurray for adorable, diverse Santas! They also have some more winter and less Christmas themed bags.
Made here in Canada, these reusable sacks are washer, dryer and iron safe, and come in a variety of cute patterns – PLUS you can make your own. Who doesn’t want a bag with your face plastered all over it? Reuse them next year, store xmas decorations in it, use it to make your laundry more festive – the possibilities are endless. The best part? Made here in Canada.
With joywrap, you never have to throw wrapping paper away again. A 2017 study by Zero Waste Canada found that more than 540,000 tonnes of wrapping paper ends up in Canadian landfills after the holidays.
That’s the equivalent weight of about 100,000 elephants of wrapping paper trash each year!
joywrap makes all the same fun sounds as traditional wrapping paper, but without any the waste.
Reuse joywrap as part of your family traditions or give it away as part of a gift.
Ultimately, the most sustainable item is the one that already exists. Try reusing old newspapers, or magazines, have children decorate some brown packing paper with their own cute holiday designs. Attach natural items like cedar twigs, or pinecones – really the only limit is your imagination. And when you make something like this by hand, the person receiving it can really see the effort and care you put into it, which always makes it that much better.
Greenpeace has a great article on some ways to wrap presents without having to buy any wrapping – check it out here.
Got some eco-friendly wrapping ideas of your own? Let us know in the comments.
Minimize waste this holiday season by sourcing and reusing vintage and antique Christmas ornaments.
Today’s Sustainable Sunday is going to look at one of the ways you can minimize waste this holiday season; by sourcing and reusing vintage.
Those stockings you’ve hung by the chimney, with care, likely spend at least 11 months of the year tucked away safe – as do the ornaments, table decorations, lights etc. etc. And this is nothing new: families have carefully stored their delicate, often expensive ornaments away for generations. Because of this, finding vintage Christmas decorations is usually pretty easy. So if your tree is looking a little bare, and you haven’t inherited any or built up a collection of your own, I suggest starting with some classic pieces that will bring that nostalgic holiday feeling along with them – here’s some of the most popular styles of vintage Christmas decor, along with the approximate dates of their peak of popularity.
Cardboard Dresden Ornaments (1880-1910)
These precious little embossed ornaments originate in the Dresden-Leipzig area, which is how they got their name. These small, delicate pieces were made by dampening cardboard to make it flexible, and then pressing it into a stamping die to emboss it. Some were painted, many were gilded, and they came in shapes that ranged from exotic animals like peacocks and polar bears to sailboats, sleighs and stars. While they were mass-produced (by hand) in their day, their delicate nature means that there are relatively few that remain today. True antique Dresden ornaments can cost you a pretty penny, so if you find one at an estate sale or swap meet, be sure to snatch it up!
Putz Houses (1920-1950)
According to this article about the history of these cute little houses, putz is German for putting or placing things together to create a scene: more specifically, it comes from the German word putzen which means to decorate or adorn. While there have been many iterations of small Christmas villages through the years, the ones referred to as Putz Houses are generally no more than 5″ tall, made of cardboard and covered in fake snow (mica) and glitter. Originally coming to North America from Eastern Europe, after WWI the mass-production of these little gems shifted to Japan. The Japanese didn’t share the same Christmas traditions, but they perfected the process of manufacturing them and based them off of American home design, so until WWII the majority of our little homes were shipped from overseas. You will find similar cardboard houses made post-war – some again coming from Japan, many made in the USA – but there is significantly less detail to the designs, and most diehard collectors are only really interested in the Japanese originals (see above – far left is a mid-century collection vs the more detailed originals from the 1920s).
spun cotton ornaments (1880-1940)
Referred to as “spun cotton”, these are basically felted ornaments that come in a wide array of shapes and sizes. As with many of the ornaments we still love today, these originated in Germany, first appearing in the late 19th century. Early examples are often of fruits or even vegetables, and later iterations include little people or fairies. They were initially made by winding cotton around a basic wire frame, but later examples would consist of tightly wound cotton pressed in a mold. If you wanted to try doing your own sometime, I’d recommend using a felt hook.
Kugel Ornaments (1850-1910)
Another type that originated in Germany, these heavy, glass pieces are quite valuable, if they are a true Kugel. While the word kugel means “ball” these hand-blown ornaments come in a variety of shapes, often fruit. First made in the mid 1800s, the originals were so heavy they couldn’t hang on trees, and instead were suspended from the ceiling. By the 1880s, lighter versions were hitting shelves and making their way to North America. Apparently the way to distinguish an original from a reproduction is to examine its cap.
Shiny Brite Ornaments (1930-1960)
Vintage Shiny Brites are what you are most likely to encounter while thrifting for old Christmas ornaments. Originally made in – you guessed it! – Germany in the 1930s, these beautiful, sparkly balls and bobbles were created by ornament maker Max Eckardt, who had the genius idea to coat glass with silver nitrate, making them shine longer than any others on the market. The originals came only in silver, but as their popularity grew in the 1940s and 50s the company expanded into everything from red and green to bright pink. Mass-produced and popular for decades it’s not difficult to find some, although their resurgence in popularity means you may be paying a fair bit for each. A word of warning – these are very, very delicate. Their thin glass can be crushed in your hand if you’re used to dealing with glass balls from the past 20 or so years, so keep these away from little, or slippery hands. And if you’re a stickler for the real thing, be sure to check the top cap – these have been reproduced and imitated for decades, but nothing beats the real thing.
Got any classic Christmas styles you think we should add? Let us know in the comments.
Fast fashion is killing the planet – learn how to “mend and make do” to get the most out of your clothes.
When I was a kid, my mom bought everything about 10 sizes too big – “you’ll grow into it!” she’d insist over my groans, and I would head off to school with about a foot of denim rolled at my ankles.
I really am only exaggerating a little.
It may have been an annoyance then, but as I’ve gotten older I’ve found the value in making things last as long as they possibly can, and have realized that that habit was passed down not just by my mother, but from hers who grew up during the depression, and my grandmother’s mother who grew up at the turn of the (last) century, and likely for years before that.
Mothers have been following the “mend and make do” adage for generations.
You’ve likely rolled your eyes after hearing someone older say, “they just don’t make things like they used to!”, and admittedly, there are many things we have today that are better than what we had a generation ago: clothing is not one of those things.
Fast fashion is killing the environment. And no, that’s not as outrageous as it sounds when you break it down:
North Americans send over 10 million tonnes of clothing to the landfill every year, 95% of which could be reused or recycled
One trillion kilowatt hours are used by the global textiles industry every year, which amounts to roughly 10% of the world’s global carbon impact
It takes 2,650L of water to produce one cotton t-shirt, which is basically the equivalent of 28 baths
It is estimated 17-20% of total industrial water pollution comes from textile dyeing and treatment
Personally, I’ve always been someone who washed my stuff in cold and hung it to dry. I take care of my clothes and that’s why, at 30(+) I still have things I wore at 14 that are in great shape. Unfortunately, the same cannot be said for some of what I’ve bought the past few years, much of which has barely lasted a season. And it’s not about the quality, or, at least not the price. As I’ve gotten older I’ve tried to buy better quality items in hopes that they will last, but really I have found that rarely do price and quality have any clear connection. A lot of the time, a shirt I’ve spent $60 on falls apart faster than one I’ve bought for $10.
So, what do we do?
For my part, being a vintage fan, I think there are 2 great ways to go – buying vintage clothing and mending what you already have.
This week we’ll focus on mending.
Don’t worry, I’m not much of a sewer myself, so I’m going to do a brief run-down of how to determine what can be mended and how, and then maybe at a later date I’ll get someone more skilled to show how you can really step it up a notch.
The first thing you need to do is identify what needs to be done.
What Needs Fixin’
Sounds obvious, but I don’t just mean find where the tear is. Think about what you really need to have repaired, and why. Got a hole in your jeans? Does it matter? Some people pay extra for that. Got a hole in a blouse? Do you wear it under a sweater or jacket? Maybe a quick fix to stop it from getting worse is enough. Is it something that will definitely be seen? A better quality repair is needed. Sure that it’s beyond repair? Think about whether someone else would feel the same (can you donate it to a thrift store, or a theatre company?), whether you can reuse it in another way (cut up could it make a cute headband? a pillow?) or how you can recycle it (like through our Value Village FunDrive).
On The Mend
Once you’ve determined the spot that needs fixing, you need to figure out what kind of fix it needs. Are you going to be adding material to create a patch? Stitching to repair a hem or a seam? Doing an invisible mend by darning? To determine what path to choose you need to know, a. the end result you want, and, b. the material you are working with. So let’s break some of that down.
mending silk
Use fusible material to repair delicate silk
Silk is a delicate, natural fibre harvested from the cocoons of silk worms. It’s breathable, beautiful, and notoriously difficult to repair. But if you find yourself with some damaged silk, don’t despair. While the chance of a totally invisible repair is slim, fusible fabric placed on the inside of the garment can save many pieces, like the vintage lingerie in this article. Fusible interfacing is not a difficult thing to use but can still be an easy thing to mess up: make sure you read the instructions twice, watch the temperature of your iron, and take your time so you don’t make the damage even worse. If you have a steady hand and some sewing experience, you can try to take a hidden piece of fabric from your garment and patch it with the same, but don’t try this if you’re not a sewer, it’s finicky work. Along with rips or tears, snags are a common problem with silk: this post gives a detailed breakdown of how to fix them, and why you should do that before it turns into something bigger, like a hole.
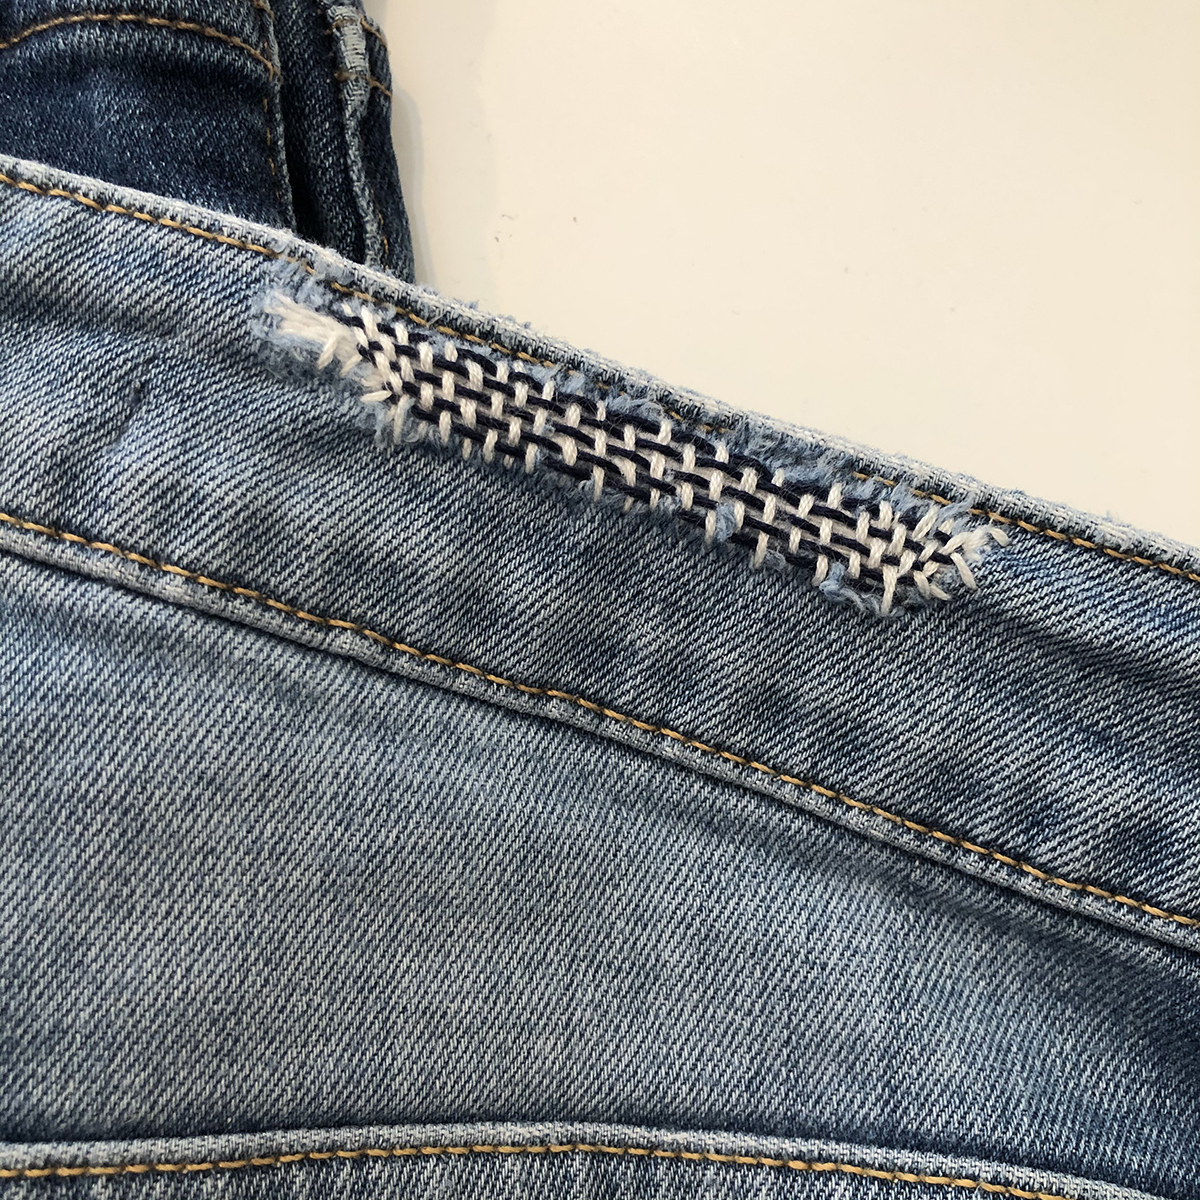
MENDING denim
Creative denim fix with embroidery
Pure denim is a very sturdy material, created in the mid-19th century for use as workwear. But most of the denim we get today is a blend, often containing lycra or some other flexible material to make them stretchy and form-fitting and that has the unfortunate side effect of being more prone to damage. This article shares several ways you can repair your denim, whether you want to try to stitch an invisible seam or play up the patch with some sashiko embroidery.
mending knits
Darning can save a damaged knit
You’ve likely heard someone talk about “darning socks” but if you’re under 40, there’s a good chance you don’t have a clear vision of what that really is. Out of all the clothing I buy socks are easily what I have to replace the most, and it’s frustrating because it feels like I need to buy them every year. I’m a bit of a hoarder when it comes to my favourite clothes, and as nearly all my socks have some kind of strange pattern or design on them, I really do hold on to them until there’s nothing left (some are basically anklets by the time I throw them out). But back when our socks were a little bulkier and knit it was not uncommon to patch up those holes to make them last another season. This site explains how to darn, fix a tear with felted wool and mend with thread – great advice for anything from socks to sweaters.
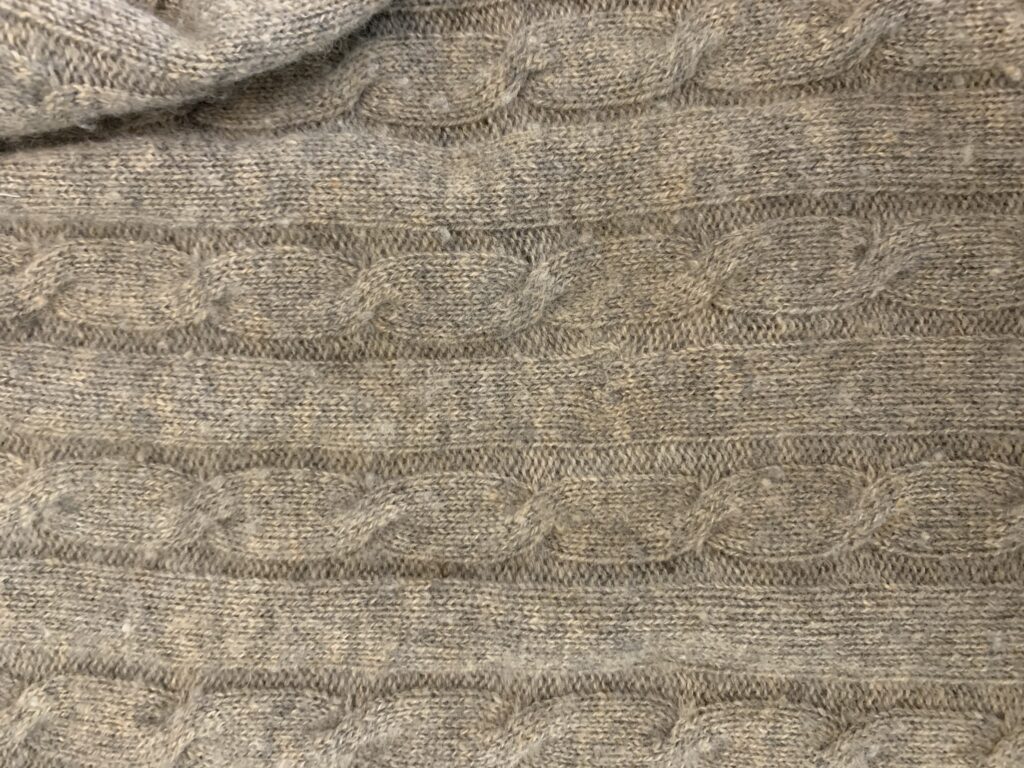
mending cashmere
Invisible repair on cashmere.
Like silk, cashmere is delicate and expensive, and until recently I would have thought there wasn’t a good way to fix it – then I came across this YouTube tutorial on how to repair cashmere with fusing powder and chopped up fibres from elsewhere on the garment. Pretty cool stuff.
***
There are countless other fabrics out there but I think this range will give you a good idea of the basic mending techniques available, and what types of materials they work best on. Basically you can patch it – with either an invisible, or a visible, decorative patch – or stitch it – with an invisible stitch or embroidery. I have a pile of mending I’ve been meaning to get to for ages, so when I finally pull it out I’ll be sure to record my progress, regardless of how it goes.
Have any of your own tips for mending garments? Let us know in the comments.
For the first of our Sustainable Sunday posts, we’re going to look at environmental sustainability and how we can work towards that in theatre. First up! Stage Manager kits.
For the first of our Sustainable Sunday posts, we’re going to look at environmental sustainability and how we can work towards that in theatre. First up! Stage Manager kits.
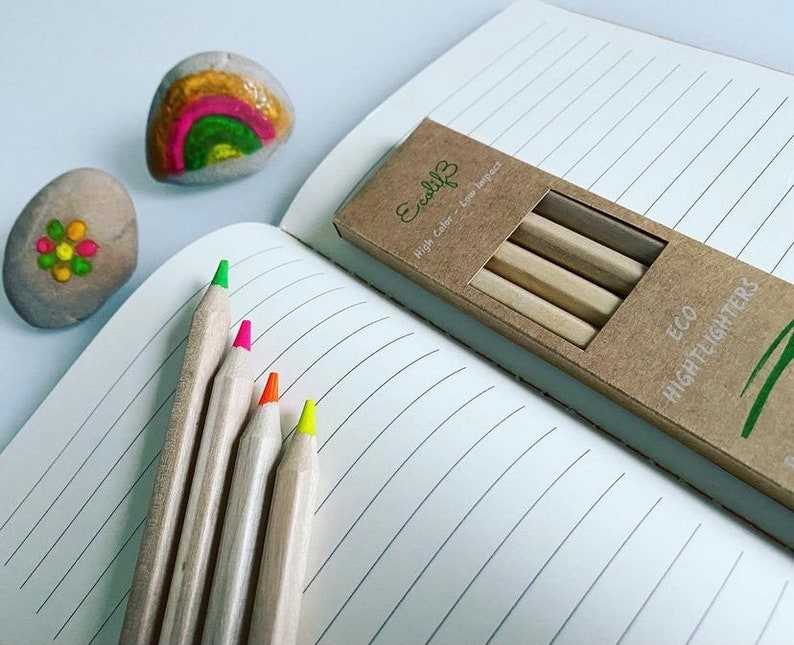
Highlighters:
I’ve never known an SM who doesn’t have a wide variety of highlighters in their kit – unfortunately, on top of being made of plastic, these can be prone to drying out, creating a lot of unnecessary waste. Try for pencil highlighters instead – no plastic, no risk of drying out, fit easily in your pencil case. Check out Etsy for ones like these.
Sticky Notes:
As much as I hate the waste, I’ll admit, sticky notes are a big part of my life. Ideally, of course, you’d use none, or at least fewer than you likely do now, but if you’re like me and find every prompt book is doubled in size by your stickies, try some like this: 100% recycled material, 100% recyclable, and plant-based adhesive. And after the show, recycle those bad boys!
Staples:
Instead of staples, try using paper clips! I was pleasantly surprised to find these recycled ones on a Canadian site, made with 90% recycled materials.
Staples (Again):
If you’re looking for something more heavy-duty than paperclips, binder clips are a great alternative. I like to have a variety of sizes and colours as I use that to sort things as well. After the show, just pop them back into your kit! I haven’t had any luck finding recycled ones, but if you come across some, post the link in the comments.
Batteries:
All SMs need at least some AA batteries in their kit, for things like flashlights, on-set practicals, what have you. These eneloop pro rechargeable batteries are praised on several sites for having great charging power and capacity – and look! You can get them somewhere other than Amazon.
Spike Tape:
Another SM necessity, unfortunately there aren’t too many eco-friendly types out there (it’s the nature of the glue needed). While you may be stuck with the usual glow & electrical tape, when you’re blocking rehearsals try for something paper based, like this.
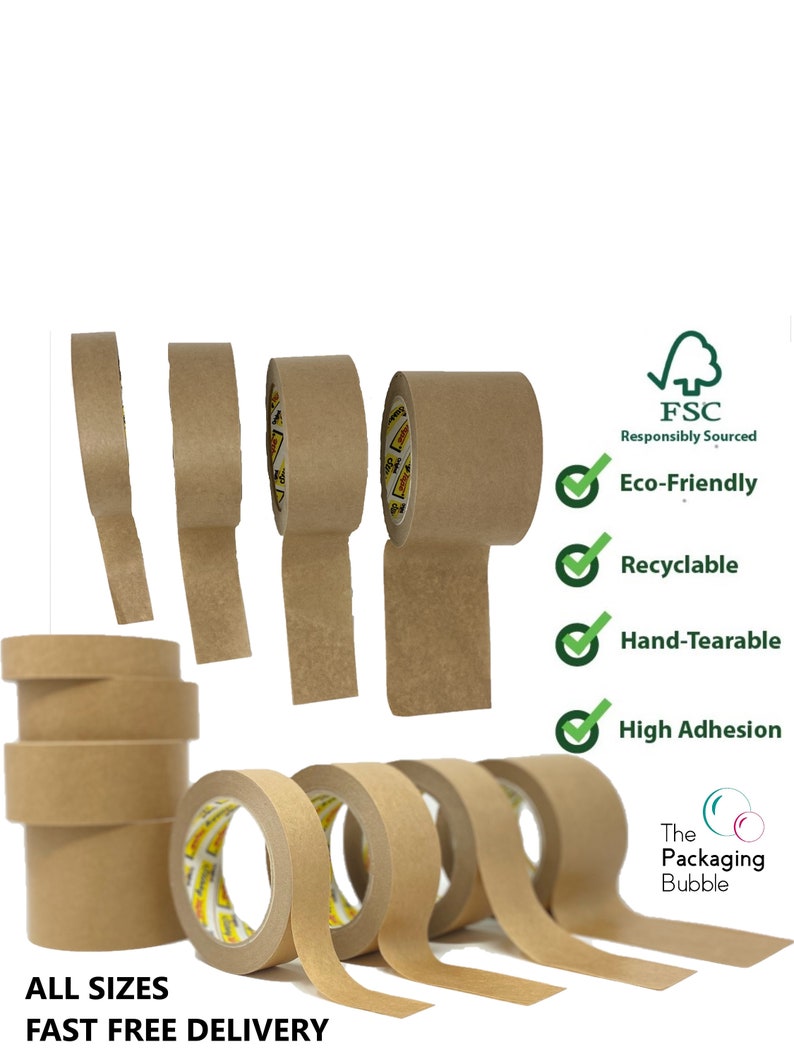
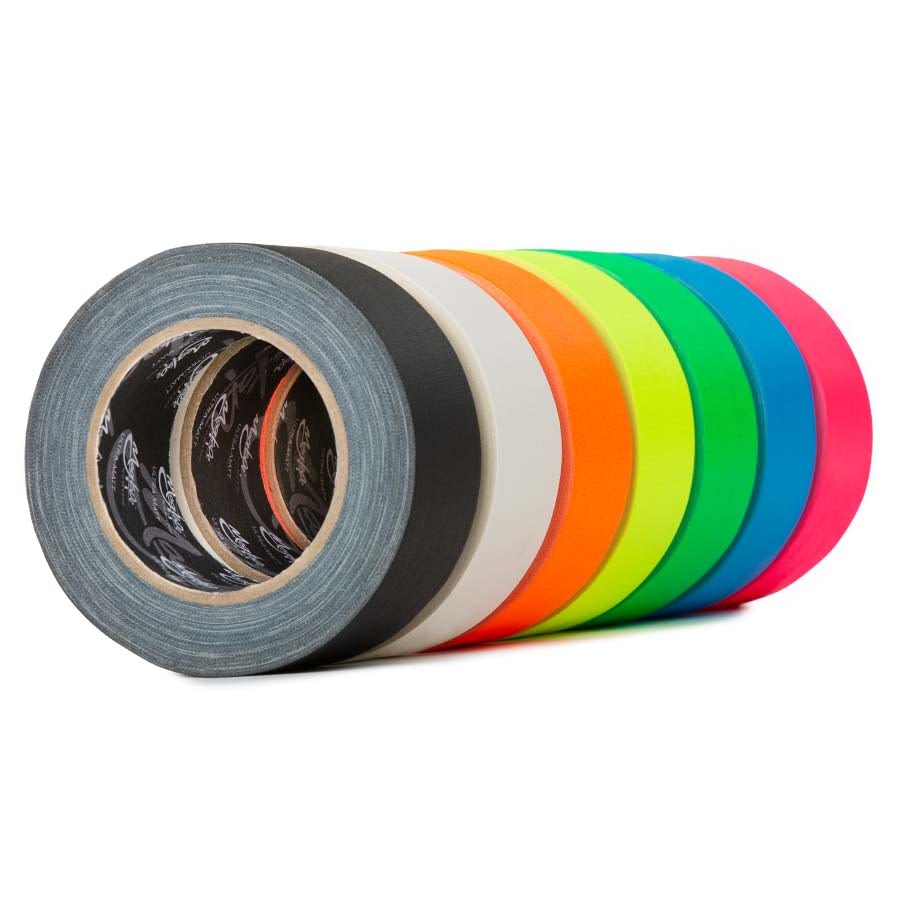
Gaff Tape:
As mentioned above, it’s difficult to produce a truly eco friendly tape as the glue needs to be something that sticks to surfaces, without sticking too much to itself on the roll. The best I’ve found so far is this UK import that uses recyclable packaging, rubber-based adhesive and reduced chemical agents. (Of course, if you need to import it from overseas, consider the environmental costs of doing that – no perfect answer for us Canadians, yet).
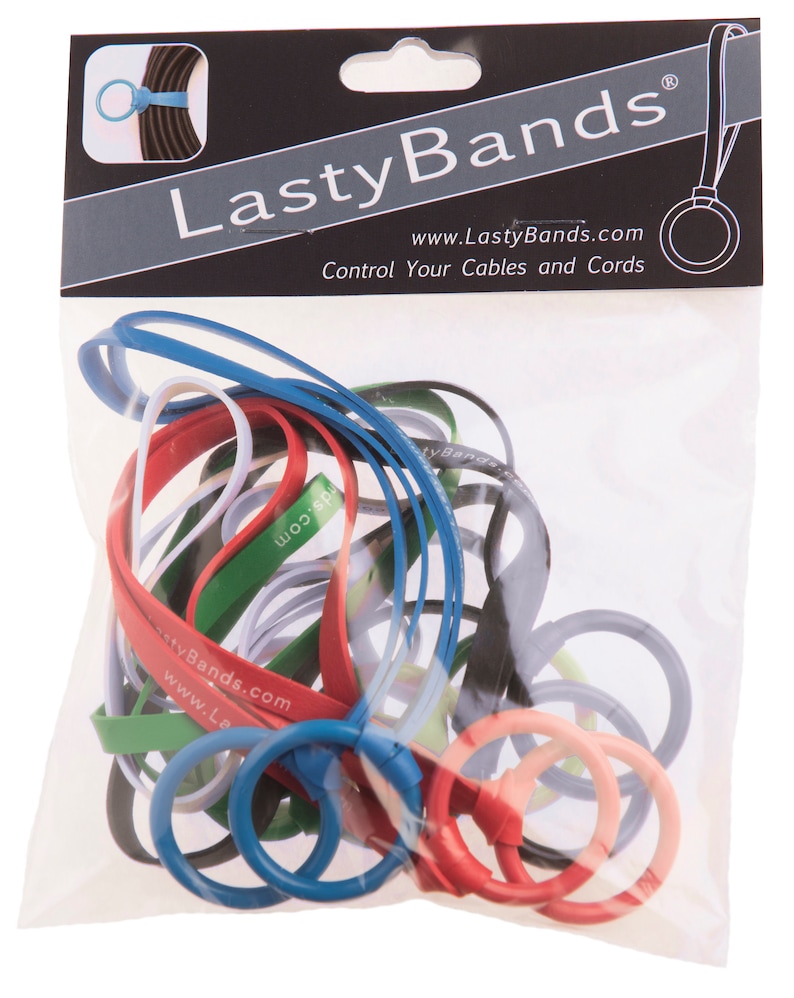
Cable Ties:
Now, if you’re looking for strength, admittedly, the typical plastic zip ties may be what you need to use, but when it comes to organizing your cables and keeping them safely bundled away, there’s no reason not to go reusable.
In addition to these you can also save by investing in quality items. Instead of grabbing a binder from the dollar store that needs to be replaced every show, try for a sturdier one that can be used time and again. Use pencils instead of pens (don’t forget to pack a sharpener!) or try for refillable pens. Bring your refillable water bottle, pack it all in a sturdy kit and you’re good to go!
Got more ideas for sustainable SM kits? Let us know in the comments below.
Do you have the post-Christmas blues? Wish that giving season came back? Want to support a great cause AND get rid of everything you just replaced with gifts? Donate your used clothing and small household items and help independent theatre thrive. Bygone Theatre has partnered with Value Village to help you help us. Every pound you donate translates to dollars on the stage. Your donation will help us put on the quality, historically accurate shows you love – but will also help us house our large vintage and antique prop and costume warehouse AND allow us to give back to the arts community. Get an early start on spring cleaning and come to any one of our community partners today!
Event Dates: December 20 – February 1, 2020
Collection location during drive: 38 Cross St, Toronto, ON M9N 2B9
Gigi’s House of Frills, 731 Dovercourt Road, TORONTO, ON M6H 2W7